
Move your data from another accounting platform
3-minute read · Last updated 3 November 2026
Import your customers, suppliers, opening balances, documents and payments from CSV or .xlsx files, in the right order, with a preview before anything is saved.
Before you start
- You need a role that can import data. The Owner, Admin and Accountant roles can.
- Export your data from your old accounting platform as .csv or .xlsx files. An old .xls file must be saved as .xlsx first.
- Each file must be within the size limit shown under the file box.
- Before you import payments made or received, add your bank accounts in RTS Book, so you can choose one for the batch.
Steps
Know the import order
The list on the import screen is grouped into four steps. Work through them from top to bottom, because later imports look up records from earlier ones.
- Step 1 — Master data: Customers, Suppliers, Products & services and Chart of accounts. These need nothing else.
- Step 2 — Opening balances & journals: Opening balances, Manual journals and Fund transfers. These need the chart of accounts.
- Step 3 — Documents: Quotes, Sales invoices, Credit notes, Bills, Supplier credit notes and Expenses. Import quotes before sales invoices, and sales invoices before credit notes. Import bills before supplier credit notes. Documents need their customers or suppliers.
- Step 4 — Payments: Payments — on account, Payments made and Payments received. Import these last. Payments made need your bills, and payments received need your sales invoices.
Most types come in two versions. Choose "(CSV)" for a file in RTS Book's own column layout. Choose "(other platform export)" for an export file taken straight from another accounting platform.
Import a file
- Go to Sales › Customers and click Import. The page Import data opens. The Import button is also on the Invoices, Bills, Expenses, Journal and Payments lists.
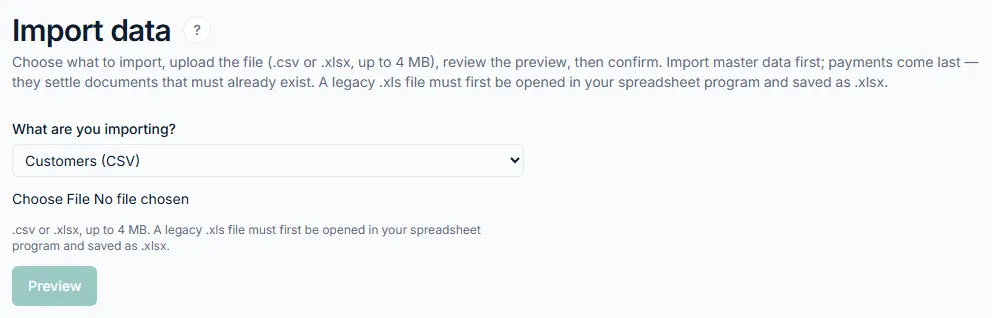
- In What are you importing?, choose the type of data in your file.
- If the screen says to import something first, do that import before this one. The file box stays disabled until then.
- For opening balances, choose the Opening balance date.
- For Payments made or Payments received, choose the Bank account for this batch. Every bank transfer, card or cheque receipt in the file is recorded through this account.
- Click the file box and choose your file.
- Click Preview.
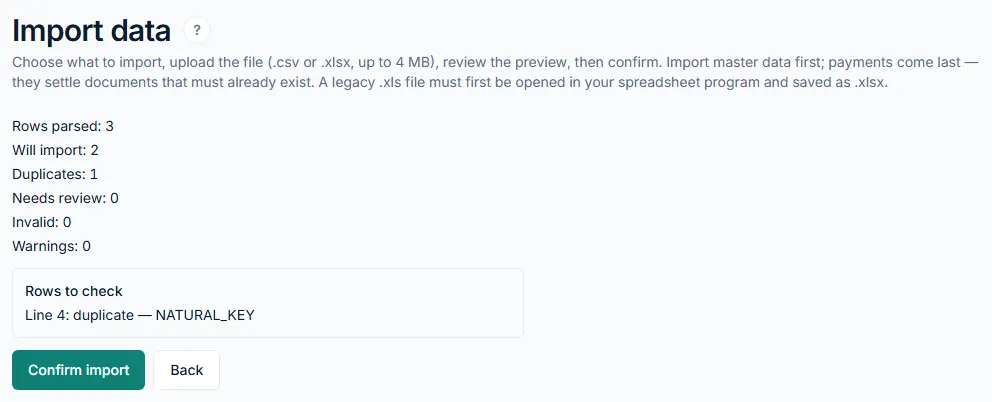
- Read the preview: Rows parsed, Will import, Duplicates, Needs review, Invalid and Warnings. Check any lines listed under Rows to check.
- Click Confirm import. To change the file, click Back instead.
- Wait until the screen says the import is complete.
- Click Import more data and repeat these steps for the next file in the order above.
What happens next
- The imported records appear in their lists, such as Sales › Customers or Purchases › Bills.
- Duplicates are skipped, so a customer that already exists is not created twice.
- A large import may keep running in the background. Refresh the page after a few minutes to see the result.
- If the preview shows Refused, nothing was imported. Fix the file and upload it again.
- When you have finished, compare your trial balance in RTS Book with your old books.
Common mistake
Importing payments before the invoices and bills they pay. A payment settles a document that must already exist, so the screen blocks a payment import until that document type is in your company. Your company starts with a default chart of accounts, so imports that need accounts are never blocked. If your old books used their own account names, import your chart of accounts in Step 1 anyway, so later files post to the right accounts.
Related
Last updated: 3 November 2026