
Customers
3-minute read · Last updated 3 November 2026
Add a customer quickly or with the full form, record their TRN and place of supply, and edit, archive or delete them later.
Before you start
- You need a role that can manage customers. The Owner, Admin and Accountant roles can do this by default.
- If you already keep a customer list in another accounting platform or a spreadsheet, you can import it instead. See Move your data from another accounting platform.
Steps
- Go to Sales › Customers.
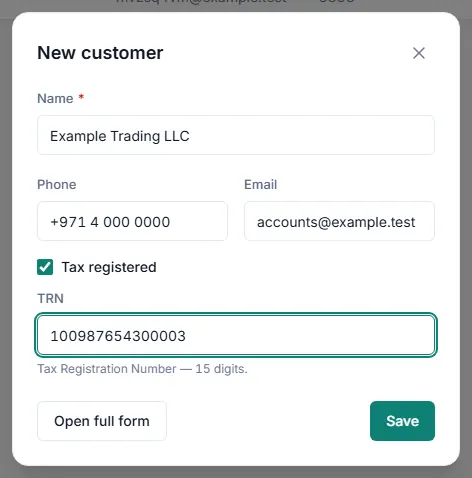
- Click New customer. A small window opens.
- Type the customer's Name. This is the only required field.
- Add the Phone and Email if you have them. You need an email address to send quotes to the customer from RTS Book.
- If the customer is registered for VAT, tick Tax registered and type their 15-digit TRN.
- Click Save to create the customer now, or click Open full form to add more details first.
Add the full details
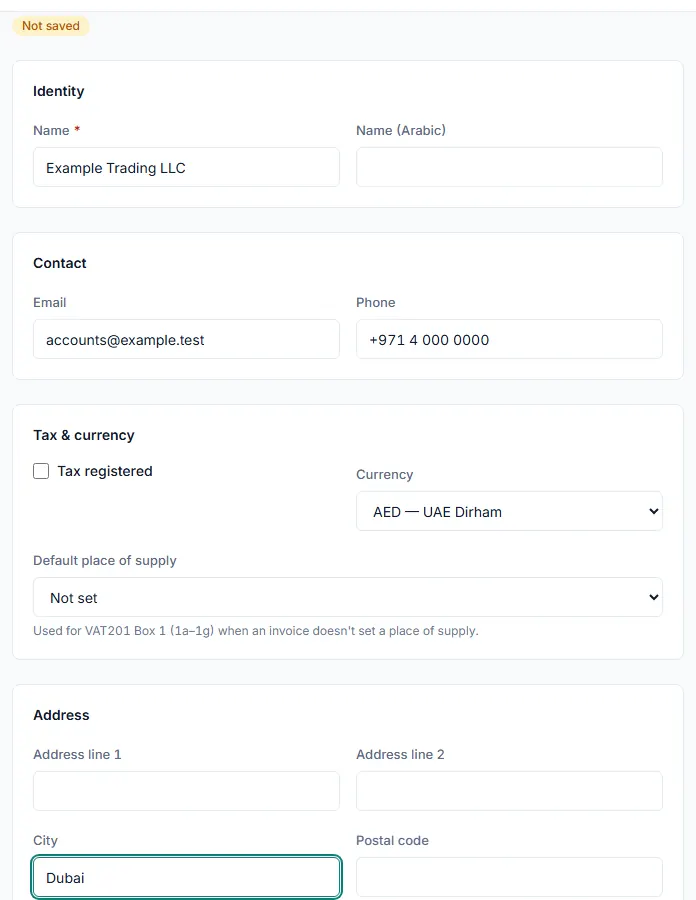
- In the full form, check the Identity section. You can add a Name (Arabic) to print on documents.
- In Tax & currency, choose the customer's Currency. New invoices and quotes for this customer start in this currency.
- Choose a Default place of supply. It is used for VAT201 Box 1 (1a–1g) when an invoice does not set a place of supply.
- Fill in the Address section: Address line 1, Address line 2, City, Postal code, Emirate and Country (ISO-2).
- If you use eInvoicing, fill in the eInvoicing identity section, for example TIN, eInvoicing status and Established in a UAE free zone. Leave TIN empty when the TRN is filled.
- If goods are delivered somewhere else, fill in the Delivery address section.
- Add any internal Notes.
- Click Create customer.
Edit, archive or delete a customer
- On the Customers list, find the customer. Use the search box to search by name, email or TRN.
- Click Edit to change their details, then click Save changes.
- Click Archive to set a customer aside. An archived customer is not deleted and can be restored with Restore. Tick Include archived to see archived customers in the list.
- Click Delete only for a customer that no document names. If records still name the customer, Delete is disabled.
What happens next
- The customer appears in the list and can be chosen on new quotes and invoices.
- The customer's details are copied onto each invoice when it is issued. A later change applies to documents issued after it.
- From the same row you can also use Apply credit, Advance receipt and Refund for money held on the customer's account.
Common mistake
If RTS Book shows "This customer may already exist", a customer with the same name, email or TRN is already saved. Open the existing one from the link before you click Create anyway, so you do not end up with two records for the same customer.
Related
Last updated: 3 November 2026