
Invite users and set their roles
4-minute read · Last updated 3 November 2026
Invite people to your company by email, choose the role that sets what they can do, change a member's role, and manage their access later.
Before you start
- You need the Owner or Admin role. Other users can see the Users screen only if their role allows it, and cannot invite anyone.
- Your plan sets how many users your company can have. A pending invitation holds a seat until it is accepted, revoked or expires.
- You can only give a role whose permissions you hold yourself.
- There are three roles. Owner has full access, including billing and users. Admin has everything except billing and can invite and assign roles. Accountant works on the books, VAT and reports, and cannot invite users or change billing.
- The role is chosen when you send the invitation. You can change it later with Change role on the person's row.
Steps
Send an invitation
- Go to Settings › Users.
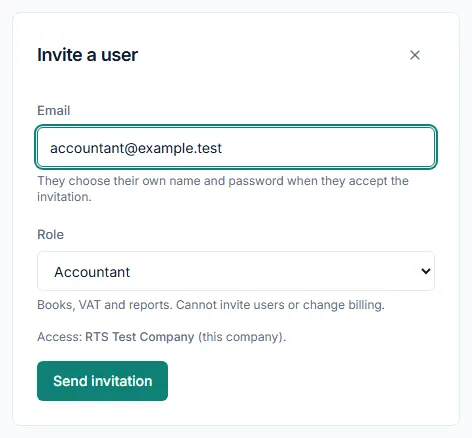
- Click Invite user.
- In Email, type the person's email address. They choose their own name and password when they accept.
- In Role, choose the role. The text under the list explains what the role allows.
- Check the Access line. The invitation gives access to this company only.
- Click Send invitation. The screen shows Invitation sent to and the address.
What the invited person does
- They open the invitation email and click the link. The link expires in 72 hours.
- On the Join page they type Your name, Choose a password and Confirm password.
- They tick the box that starts with I agree to the Terms & Conditions.
- They click Accept invitation, then sign in.
Manage a user's access
- In the user list, find the person's row.
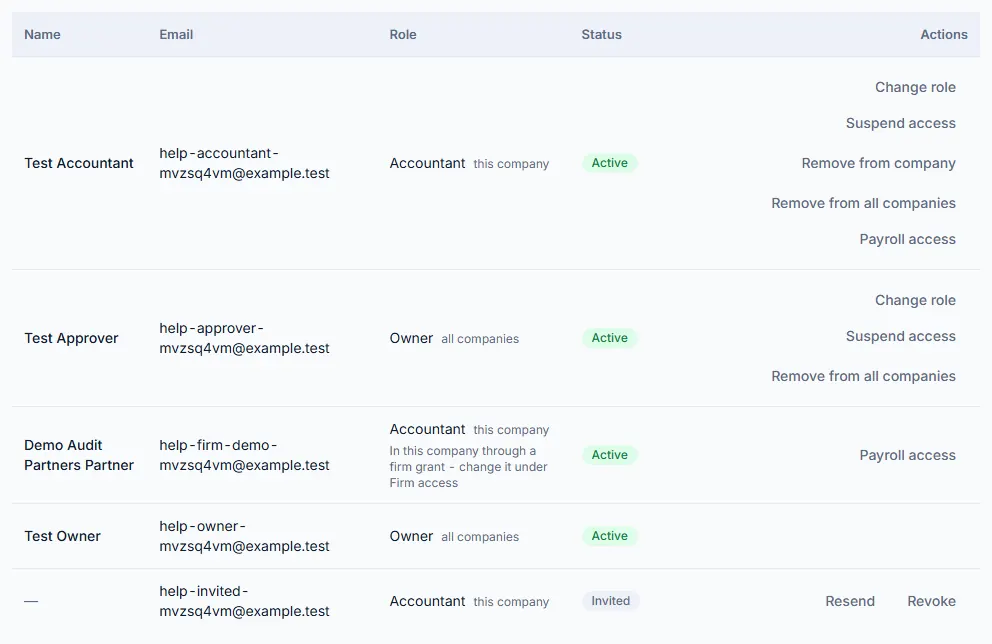
- For a pending invitation, click Resend to send the email again, or Revoke to cancel it.
- For a member, click Suspend access, Restore access, Remove from company or Remove from all companies.
- Type Your password, and your Authenticator code (if two-factor sign-in is on), then confirm.
Change a member's role
- In the user list, find the member's row and click Change role.
- In New role, choose the role. You see only the roles you can give yourself.
- Type Your password, and your Authenticator code (if two-factor sign-in is on), the same as for Suspend access.
- Click Change role in the window. The row shows the new role, and the person works with it from their next page load.
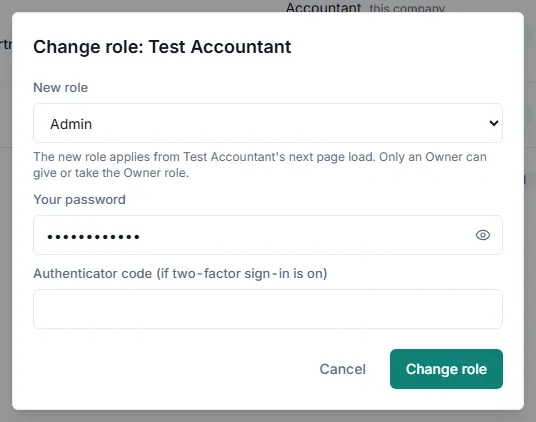
Note: only an Owner can give or take the Owner role, and the last active Owner of the company always keeps it. You cannot change your own role. A person from an accounting firm who works in your company through Firm access has no Change role button; their row says so, and you manage them under Firm access.
What happens next
- A pending invitation shows the status Invited. It changes to Expired if nobody accepts it in time.
- After the person accepts, their row shows Active, their role and "this company".
- Every role change is recorded in the audit log with the old role, the new role, who changed it and for whom.
- They see only the menu items their role allows.
- Only the Owner has payroll by default. To let someone else see payroll, click Payroll access on their row.
- When you remove someone, everything they created stays and keeps their name. They appear in the Removed list.
Common mistake
One email address can belong to only one RTS Book workspace. If you invite an address that already has an account in another workspace, the person cannot accept the invitation. Revoke it and invite a different email address for that person.
Related
Last updated: 3 November 2026