
Create the WPS salary file
3-minute read · Last updated 3 November 2026
Generate the WPS salary information file (SIF) for an approved pay run, download it, and upload it to your bank or exchange house yourself.
Before you start
- To generate and download the file you need the payroll permission Approve payroll, lock periods, produce the WPS file (needs an authenticator code). The company owner gives it in Settings › Users with the Payroll access button.
- You need a live code: an authenticator code, or a code sent to your sign-in e-mail if you have no authenticator app.
- The pay run must be approved. See Run payroll and payslips.
- The company owner must first save the WPS file settings, as in the first part of the steps below.
Steps
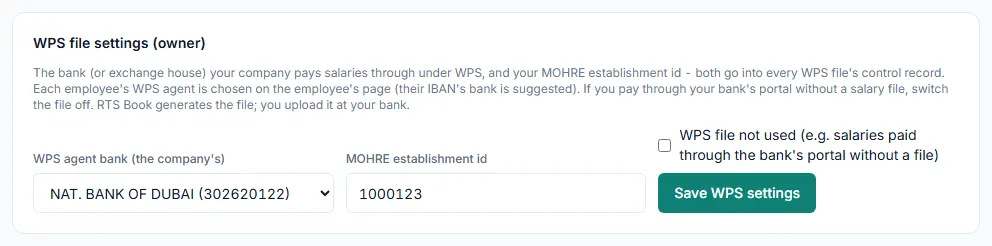
Set the WPS file settings (owner only)
- Go to Payroll › Payroll.
- Find the WPS file settings (owner) box.
- In WPS agent bank (the company's), choose the bank or exchange house your company pays salaries through under WPS.
- Enter the MOHRE establishment id, digits only.
- Leave WPS file not used (e.g. salaries paid through the bank's portal without a file) unticked if you will upload a salary file.
- Click Save WPS settings.
Generate and download the file
- Go to Payroll › Payroll and click Pay runs.
- Open the approved run you want to pay.
- Find the WPS file box. Check that the agent bank is chosen and the MOHRE establishment id is set.
- Type your authenticator code, or the code from the e-mail, in the code box.
- Click Generate WPS file.
- Check Left out of the WPS file, if it appears. It lists each employee the file does not include, and why.
- If the code box asks for a code again, type a new one. Each code works once.
- Click Download on the file's row. Your browser saves the file.
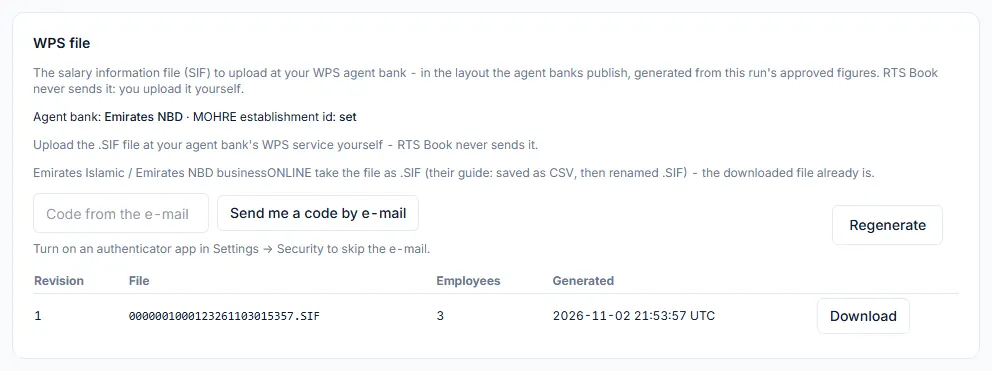
- Upload the file to your bank or exchange house through its own WPS channel, and pay the salaries there.
- Back on the run, record the salary payment in the Ledger box with Record payment.
Check the month on the WPS monitor
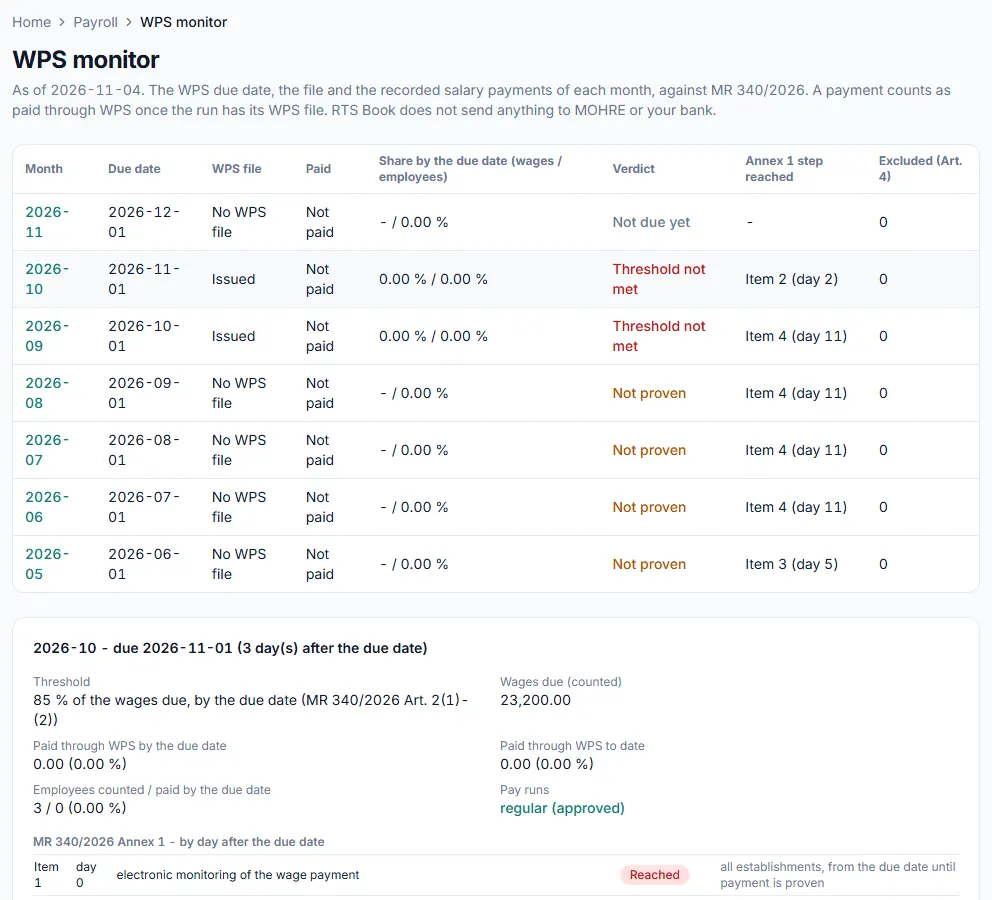
- Go to Payroll › Payroll and click WPS monitor.
- Find the month. Check the Due date, the WPS file status, the Paid status and the Verdict.
- Click the month to see its details, including any employees excluded from WPS.
What happens next
- RTS Book prepares the WPS salary file. It does not pay salaries and never sends the file anywhere: you upload it to your bank or exchange house yourself.
- If you need a fresh file for the same run, for example after the owner changes the WPS settings, click Regenerate. The previous file is kept as superseded.
- A payment counts as paid through WPS on the WPS monitor once the run has its WPS file and the payment is recorded.
Common mistake
Uploading an old file. If a file's row says superseded - run reversed: do not upload, that run was reversed and the file must not be sent to your bank. Upload only the current file of the corrected run.
Related
Last updated: 3 November 2026